

DIY drill conversions for Power Wheels can be done cheaply by recycling the batteries and chargers from old power tools (18v or 20v). The factory battery’s connector can be cut off, a 30 amp inline fuse can be added between the red wire, and the whole thing can be hooked up to the 3D-printed adaptor. Simply connecting the new battery will result in a dramatic acceleration.
This DIY Power Wheels battery alternative is a great way to recycle old power tool batteries. These lithium-ion batteries are one of the most toxic battery types in the world!
The battery can emit lead, mercury, and cadmium that pollute our landfills and cause hazardous waste for future generations.
This conversion gives the 18V or 20V power tool battery second life. We turn it into an 18V Power Wheels battery pack that will fit right inside your kid’s favorite toy car, truck, or jeep!
| 3D Printed Adapter | Fuse 30 amp | Battery | Charger | 10ga Wire | |
|---|---|---|---|---|---|
| Photo | 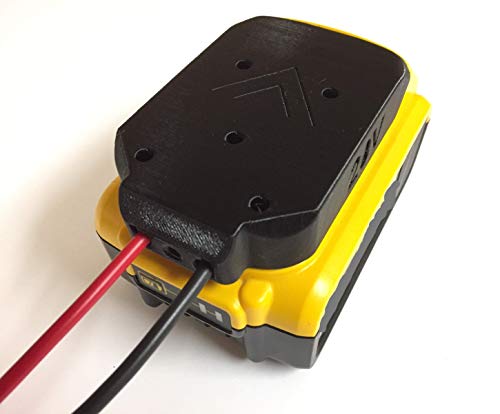 |  |  | 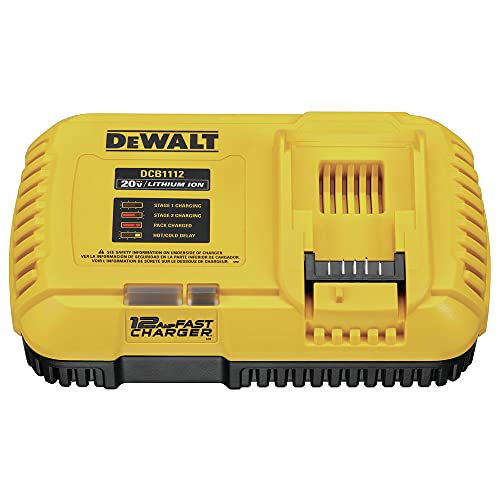 |  |
| Product | DeWALT 20V Max Battery Adapter for 18V Dock Power Connector | 16 Gauge Fuse Holder ATC/ATO Inline Fuse Holder with 30 AMP... | DEWALT 20V MAX Battery, Compact 2.0Ah (DCB203) | DEWALT Battery Charger, 20V + Flexvolt Fast Charger... | BEST CONNECTIONS 10-Gauge Automotive Primary Wire Bundle... |
| Buy |
On this page
How to Perform a Power Wheels Drill Battery Conversion
Products needed will be listed above if needed. Parts and tools that will be needed to perform this are:
Parts (Amazon Links)
- 12 volt Power Wheels (never a 6V car)
- DeWalt/Hercules Battery Adapter [Amazon Link]
- 30 Amp Inline Fuse [Amazon Link]
- DeWalt 20V MAX lithium tool battery [Amazon Link] (charged; a DeWalt or Hercules 20V pack you already own works too)
- DeWalt 20V MAX Battery Charger [Amazon Link] (skip it if the charger from your old tool still works)
- Velcro [Amazon Link] (optional)
Tools
- Wire crimper
- Electrical Tape
- Soldering Iron / 10ga Wire
- Wire Strippers
- Screwdriver
Step 1: Locate the Stock Battery
The first order of business in fixing your Power Wheels is finding the battery. Placement options include the boot, engine compartment, or passenger compartment.
If there is a bar keeping it in place, you’ll need to unbolt it from the car’s chassis before you can disconnect it from the wiring harness.
Step 2: Modify the Stock and Drill Battery
Because we require the connector plug, the next step is to sever the two wires leading to the stock battery.
Don’t forget that doing this will render the factory battery useless.
We want to take the stock battery connector plug and attach it to the 3D Printed DeWalt battery adapter[Amazon Link]. To do this, we will connect the negative (black) wire with the other black wire. To start we can just twist the wires together and use electrical tape.
You can go back over this part with crimpers later. For the positive wires (red), we want to connect these as well, except we want to put a 30 amp inline fuse[Amazon Link] between them.
This will protect your motor from too much power coming through. If it happens the fuse will break and stop it.

Step 3: Connecting the Drill Battery
Now we have the wires done. It’s time to connect everything up. Make sure the fuse is in between the red wires.
You can use Velcro[Amazon Link] on the back of the battery adapter holder to mount it inside the vehicle. It is recommended that you also install an electrical speed controller kit that way, you can control the amount of power going to the wheels, and the child can ease into the newly found power.
I know from personal experience they can really fly once you set up the 18v battery.
Step 4: Test the Power Wheels
Once the battery is connected, you want to test out them and the motors by pressing down on the gas pedal and watching the rear wheels spin. You will notice a huge difference over the stock batteries right away.
The lithium tool battery pack is also a lot lighter, increasing the speed of the ride even more than the 12v or 6v battery you started with.
Step 5: Finish Up
If all goes well, the test will have been successful and it will work great. Next, go over the wires and make sure they are secure it is recommended to solder the wires together if you are skilled in that area.
You can use a multimeter to check the voltage.
Close everything up, and don’t forget to clean up and put everything back away, or you will be like me and never be able to find what I need.
If this process is not for you, you can also purchase the replacement ride-on battery or charger here. I have it broken down by the manufacturer to make it easy to find the one you need.
Just missing the stock charger? See what to do if you lost the Power Wheels charger.
Can I Add Two Battery Packs?
A second battery, instead of the single one, can be added. Thus, the Power Wheels’ playtime will be extended by a factor of two.
Using 20v 1.5Ah batteries, you may expect a runtime of 15 minutes on a single cell and 30 minutes on two. Reportedly, this will also give it even more speed, but you must ensure that you do this correctly.
The batteries should be connected in parallel. You’ll be feeding 36-to-40-volt power to the motors if you don’t.
While this sounds nice, not only will you rip up the lawn, but you will push the electric parts of the Power Wheels too far. Not only your motors but your gearbox is made of plastic parts when stock. It will simply rip this apart.
That is why you should run the batteries in parallel. Here is a simple diagram of parallel wiring: positive to positive and negative to negative (+ to +, – to -).
The output stays 18V, and you get about double the run time. Our battery upgrade guide covers fitting a second battery and adding a fuse.
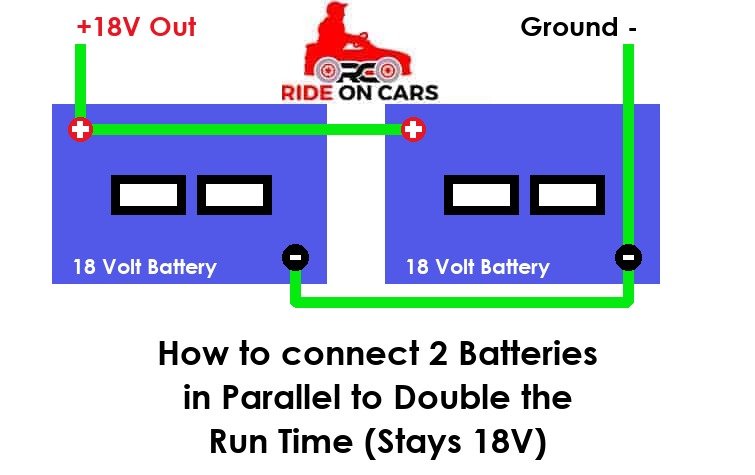
- + terminal
- − terminal
- Wire
- Battery
More options for battery upgrades.
Benefits of Power Wheels Drill Battery Conversion
- DIY installation of the battery is not too difficult and you don’t need to be an expert, however; you do need to have a general knowledge of electrical work and use the fuse.
- The battery weight is a lot less, making the car even lighter as the stock battery is usually around 10 pounds; these will just be ounces.
- Lithium batteries charge much faster. You can have extra batteries and when using one, put another on the charger.
- The vehicle will have so much power it can even do power slides when stopping (skidding out).
Disadvantages of Power Wheels Drill Battery Conversion
- Adding more powerful batteries will work the motor more and it can burn out. Recommended to upgrade the motor.
- Not only the motor but the gearbox can get grinded down if you don’t upgrade the gearbox.
- The wheels may spin if you don’t add traction simply because of all the power.
- With the boost of power and speed, it’s time to get out the helmet for the kids[Amazon Link].
- If you have a low Ah battery the run time won’t be as long as the 12V or 6V battery. For example, you can expect 15 minutes of run time with every 1.5Ah. You can combat this by looking for the higher Ah batteries or run batteries in parallel (see the wiring diagram above).
Check out how long drill batteries last for more detailed info about the conversion.
Battery Conversion Safety (Important)
Now that the toys have been supercharged, it is important to protect the kids. The new charged-up ride can really fly and possibly flip over.
It’s highly recommended to at least get helmets for the children[Amazon Link] and also raise the minimum rider age. Measure your child’s head first: this Bell toddler helmet fits 48-52 cm heads (ages 3-5), and the Bell Rally Child helmet[Amazon Link] fits 52-56 cm heads (ages 5-8).
If you did install an ESC then you can adjust the speed for each rider separately, but if you didn’t, then only allow the older children to ride in a location that is safe and free from hazards. Our Power Wheels helmet and safety gear guide also covers how to get a child to actually wear one.
Power Wheels Battery DIY Tips
- To stretch out the length of a stock motor and gearbox, make sure to not just insert new batteries when the first one dies. Give it some time for the parts to cool off.
- Upgrade the other parts like the motors and gearboxes or they will fail.
- Adding a distribution block[Amazon Link] is a great way to keep the wires organized.
- This article talks about using the adapter that works with DeWalt and Hercules batteries. You can however make them with other brands like Ryobi and Milwaukee but you would need a different adapter.
- Some people use flashlights and DIY the wires into the flashlight itself instead of purchasing an adapter. This will save money on the overall price as the flashlight is the holder itself.
Power Wheels Battery Alternatives
There are lots of battery alternatives, like taking a lawnmower battery and putting it into your Power Wheels. This is a fun DIY project but it is not as good as doing a drill battery conversion.
What is a drill battery conversion? It’s just that!
It’s taking a battery from an old drill or flashlight and making it power your ride-on vehicle.
This can be one of the best conversions if you have some broken power tools that no longer work but you still have the batteries and charger.
The above shows you how to transform a lithium-ion 18 volts battery pack into an upgraded 18v battery. This saves a lot of money compared to just purchasing an 18v or 24v Power Wheel. If you would rather buy a faster ride-on, you can search ride-on cars by battery voltage, age and weight.
Conclusion
There you have it! You saved money on the 18v batteries and the kids get really fast Power Wheels. For other speed upgrades, see how to modify Power Wheels to go faster.
This is such a great DIY project to do on stock Power Wheels, however; make sure you are aware this will wear down your motors and gearboxes much faster. If you don’t have an ESC kit you won’t be able to control the voltage going to the wheels, so the vehicle will always be moving fast.
Please be careful and use at your own risk
None of the authors, contributors, administrators, or anyone else connected with RCRideOnCars.com, in any way whatsoever, can be responsible for your use of the information contained in or linked from these web pages.

Kevinsmak
Power Wheels dad. Writing RC Ride On Cars since the start.
Hello! I'm Kevinsmak; I have been a content producer of RC Ride On Cars since the start of this site. I have always enjoyed Power Wheels with my family. My two boys love them, and seeing this helps me make sure this website is very accurate for the safety and enjoyment of your family.